Translate

Sunday, June 30, 2013

Have you ever heard of a Tassie?


Ok so if you type Tassie into word, it may try to correct you and ask for tissue, Tessie, Lassie or Kassie. So let me explain, a tassie is more common down south and they look like mini pies. Mostly given around the holidays and usually made with pecans. They look like little pecan pies. Now I like pecans but with the price I am deferring to a Chocolate Raspberry Tassies. If you can find fresh raspberries I would use them as a decoration, because they tend to explode if the get too hot.
If you have mini muffin pans this is the type of desert that goes in that pan. This is another 2 stage recipe so if you want to make these fresh and you are running short on time. You can make the chocolate pastry and leave it in the refrigerator overnight, it’s easier to use if it’s cold anyway.
Here we go:
Chocolate Raspberry Tassies

Chocolate Pastry Ingredients

  •  1 ¼  cups all-purpose flour           
  • 1/3   cup sugar
  •  ¼     cup natural unsweetened cocoa powder
  • dash of salt
  • ½     cup cold butter, cut up
  • 1      egg yolk
  • 2     Tablespoons cold water

Directions

  1. In food processor, combine flour, sugar, cocoa powder, and salt; pulse to combine. Add butter. Cover; process until crumbly. In small bowl, whisk together egg yolk and cold water. Add to processor; pulse until a dough ball forms (add water if dry). If needed, cover and refrigerate until easy to handle.

Chocolate-Raspberry Tassies Ingredients:
  • 6 ounces semisweet or bittersweet chocolate, chopped (1 cup)
  • 2 tablespoons butter
  • 1 large egg, lightly beaten
  • 1/3 cup granulated sugar
  • 1 tablespoon raspberry liqueur or raspberry-flavored syrup
  • 2 teaspoons vanilla
Directions

  1. Prepare Chocolate Pastry. Heat oven to 375° F. Divide pastry in 24 balls. Evenly press each ball on bottom and sides of 24 ungreased 1-3/4-inch muffin cups, using floured fingers if necessary; set aside.
  2. For filling, in small saucepan heat and stir chocolate and butter over medium-low heat until melted and smooth. Remove from heat. Stir in egg, sugar, liqueur, and vanilla. Spoon 1 scant tablespoon filling in each pastry shell.
  3. Bake 12 to 15 minutes or until pastry is firm and filling is puffed. Cool in pans 10 minutes. Run sharp thin-blade knife around tassie edges; carefully remove from pans. Cool on wire rack.
  4. To store, refrigerate tassies in single layer in airtight container up to 3 days. Makes 24 tarts.
So let's make life sweet and enjoy. 

Saturday, June 29, 2013

Apple Pie Turnovers


Same old thing someone wants a fruit pie for desert, now you can go to the store and get the pie mix premade, the pie shell off the shelf or ready to roll out. That is the easy way, but here’s some food for thought, where did the fruit come from, and how come the fruit is so mushy almost to the point of no texture. What about the pie shell? Can you make one that’s better and guaranteed to be flaky? The process of making pie is pretty basic. Have you ever made a turnover using fresh ingredients?
Would you feel better about giving the ones you love something that you know is better than processed and they know it tastes better, because face it, anything made with love in the kitchen translates into the food tasting better.
Let’s make apple turnovers that are filled with love and all the other good stuff.
Now if you have a pie dough recipe that you love you should use it. I received this one in one of my pastry classes and I absolutely love it, it seems to turn out right every time.
This recipe makes 3 pie shell crusts it will make about a dozen of this size turnover. The good news is you can freeze or refrigerate unused dough.


This is 4 oz. of dough spread out to 8 inch disks and then filled. I would try it first with 2 – 3 oz. of dough unless you like really big turnovers. So the recipe is as follows:

Basic Pie Dough
16 oz. Butter, Unsalted and chilled
21 oz.  Flour, Pastry or A.P. if you are going for gluten free try rice flour.
4 oz.    Buttermilk, or water (I prefer the buttermilk)
2 tsp.   Salt
.5 oz.   Sugar
1 T.      Vanilla (optional)

  1. Cut the butter into medium diced squares about 3/8 in. Sift the flour onto your work surface or in a large bowl.
  2. Cut the butter into the flour and work until mealy. (if you are in a hurry use your mixer with the paddle on the first setting)
  3. Combine the buttermilk, salt, sugar and vanilla in another bowl and mix with a whisk. Gradually add the liquid to the flour/butter mixture and mix gently until the dough holds together. Do NOT overmix this.
  4. Cover the dough and put in the refrigerator until thoroughly chilled. However, since we are making turnovers, bring out your scale and individually wrap 2 – 4 oz. balls. It will make it easier when rolling out the turnovers.

Now let’s make the filling. Fruit fillings are what you make of them. If you are making cherry then you have a couple of things to decide, the type of cherry and how sweet you would like to have it. Apple your decisions are pretty basic, apple, precooked or raw with sugar and a little butter and cinnamon. My favorite apple is a honey crisp and I like to mix the precooked with raw so it has a little texture and tenderness. To make the apples tender, I brown a little butter in a high heat pan, then I add apples, a little sugar and a little brown sugar. Once these are combined and have let go of some of their juice add your other flavors cinnamon to taste and maybe even some raisins. It’s up to you.
Let your filling cool down and thicken (sift some flour into the mix if you want a thicker filling).
Once your filling has cooled down you can pull the number of individual pies/turnover wraps that you want to bake, yes bake, there is no need to deep fry these. 

Roll one of your dough balls into an 8 inch or less circle. Add the filling (about 3 oz. for an 8 inch) bring half of your dough over be sure to seal and leave a little over for a fold over and then seal the fold over. If you would like a better idea of what I am talking about, watch this video Chef John does a great demonstration. http://youtu.be/II2gnuhe0NY

As always make life sweet and Enjoy!

Wednesday, June 19, 2013

What's your favorite cookie?

Have you ever found yourself inventing different things with a recipe that you have been using for years but you think it needs a new look?

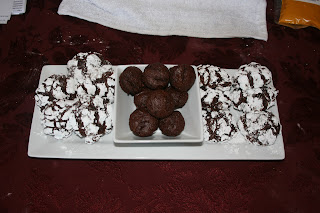
I find myself doing it all the time, usually just little things like a different nut or a different flavoring. So today I made Zebra cookies, and when I got tired of covering the dough in powdered sugar I decided to change up and make brownie bites with the same dough. I love this dough because it is so versatile. Add nuts and make a chewy nutty brownie, add cherry flavoring, or even dried fruit and it's a whole new ball game.

I gave the cookie recipe on an earlier blog "Chocolate, Stress Reliever" so if you haven't looked, at it take a peek and see what you can do.

What I would like to do is get your input on what you have done with your favorite cookie recipe, we will share them today and tomorrow and then on Friday I will post my banana split cookie recipe, I got the idea one day when I was making my grandmother's pumpkin cookies. (a recipe I cannot share with anyone but family sorry), but I will happily share my recipe with you, then you can tell me what you think.


Tuesday, June 18, 2013

Tiramisu, Tuscany’s Trifle


Tiramisu, the Tuscan trifle rumored to have been around since the 17th century but written recipes didn’t appear until the late 20th century. Who cares? People love tiramisu especially those coffee lovers. My friend Lori, loves tiramisu and would love to know the secret. So let’s make this for all those friends who love coffee or just good dessert.
To start we need to make a Ladyfinger sponge, similar to what we did for Charlotte. 

Lady Finger Sponge
Preheat oven to 375°. Line sheet pan with parchment paper. 

Ingredients:
6 oz.
Egg Yolks


3 oz.
9 oz.
5 oz.
¼ tsp. 
10 oz.
Sugar
Egg Whites
Sugar
Lemon Juice
Pastry flour

Directions:
1.            Put yolks and 3 oz. sugar into a bowl over a hot water bath stir with a wire whip until the mixture warms to a temperature of about 110°.
2.            Put the egg whites in mixer with whip attachment, start whipping until frothy add 5 oz. sugar and then add lemon juice whip to firm peaks. Fold into the egg batter alternately with sifted pastry flours. Fold until just mixed.   
3.            To pan, using a pastry bag fitted with a medium plain tip. Pipe the sponge mix on the parchment lined sheet pan. Bake for about 10 minutes. Let cool. Cover the entire sheet pan.

Mascarpone Filling
1          Egg yolk
3 oz.    Sugar
2 oz.    Water
1 oz.    Glucose or corn syrup
8 oz.    Mascarpone Cheese
12 oz.  Heavy Cream

  1. Whip the egg yolks until light yellow.
  2. Make a syrup of the sugar water and glucose and cook to 248°. Slowly pour syrup into yolks while still whipping. Whip until cool.
  3. In a mixer fitted with a paddle attachment, mix until the mascarpone is soft.
  4. With the mixer on low, add the egg yolk mixture a little at a time, wait until blended completely before adding more.
  5. Whip the cream to soft peaks. Fold into the mascarpone mixture.

Tiramisu
1 sheet Ladyfinger Sponge
1 pint   Strong Espresso Coffee
8 oz.    Dessert Syrup (this is a simple syrup with a flavoring added, in this case I would use chocolate liqueur)
24 oz. Mascarpone filling
14 oz. shaved chocolate
Cocoa for dusting.

  1. Cut the sponge sheet in half crosswise.
  2. Combine the espresso and desert syrup. Brush the sponge sheets generously use it all.
  3. Place on sheet on a tray. Put shaved chocolate on the espresso soaked cake. Spread half the mascarpone filling on the top.
  4. Top with the second layer of sponge, the remaining filling. Smooth the top and chill until firm.
  5. Dust generously with cocoa powder and if you would like more shaved chocolate.
  6. Cut into 12 portions.

As always make life sweet and Enjoy!